Recently, I started to deploy mini apps using Coolify. One thing I struggled with was securing those apps with authentication.
I first tried the Basic Auth Middleware. It does the job, but it’s not user-friendly. I have to create a new username and password for each app, and it’s hard to manage.
Then, while I was checking Authentik, I noticed that it has a Forward Authentication feature, which would be a great option for my cases.
To be honest, Authentik doc and Coolify doc did explain everything. However, since I’m new to Traefik and Forward Auth, the documentation wasn’t clear enough for me, and I spent a lot of time figuring out how to make it work. I decided to write this guide to help others in the same situation.
Deploy Authentik Service
The first step is to deploy the Authentik service. As of Jan 28, 2025, the official Authentik Template in Coolify repo does not expose the port (see this issue). So, it does not work out of the box. You have to modify the template to expose the port. Copy the template to your favorite text editor and add ports below services.authentik-server.image, so it should look like this:
services:
  authentik-server:
    image: ghcr.io/goauthentik/server:${AUTHENTIK_TAG:-2024.12.2}
    ports:
      - "9000:9000"
...
Then, deploy the Authentik service using the modified template. Choose Docker Compose Empty and paste the modified template.
Once the Authentik service is up and running, visit http://<your server's IP or hostname>:9000/if/flow/initial-setup/ to set up.
Create an Application and Proxy Provider
Now, create an application in Authentik. You can follow this video (starting at 9:40 and ending at 11:40) to create an application with Forward Auth.
Based on your requirement, you can choose Forward auth (single application) or Forward auth (domain level). Since my apps run on multiple domains, I choose Forward auth (single application).
Create the Traefik Configuration
In the provider you just created, Authentik provides a few configurations for different proxies. However, none of them work for Traefik inside Coolify. Now, let’s return to the Coolify doc and continue.
Finding the Authentik Server Host
We need to figure out what the Authentik server host is. Navigate to the Authentik service in Coolify and go to the Terminal tab. Expand the Container dropdown, the one with the key server is the Authentik server host.
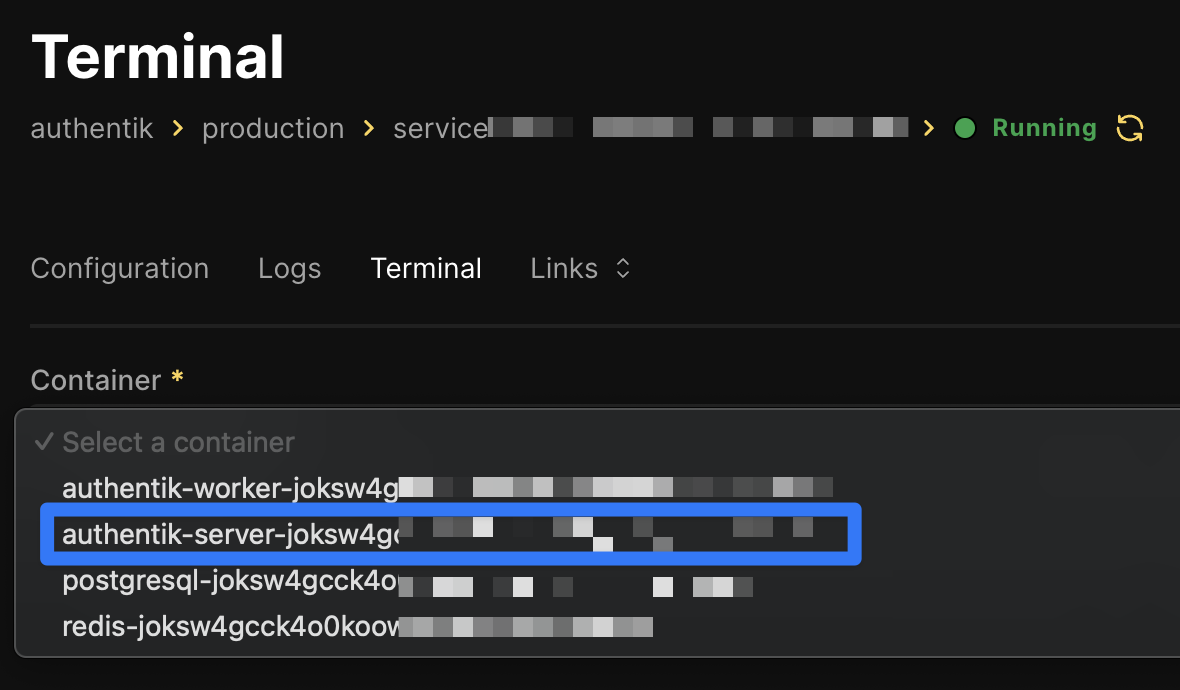
Copy it from the source code or Developer Tools panel (do not try to type it) and save it in your favorite notebook.
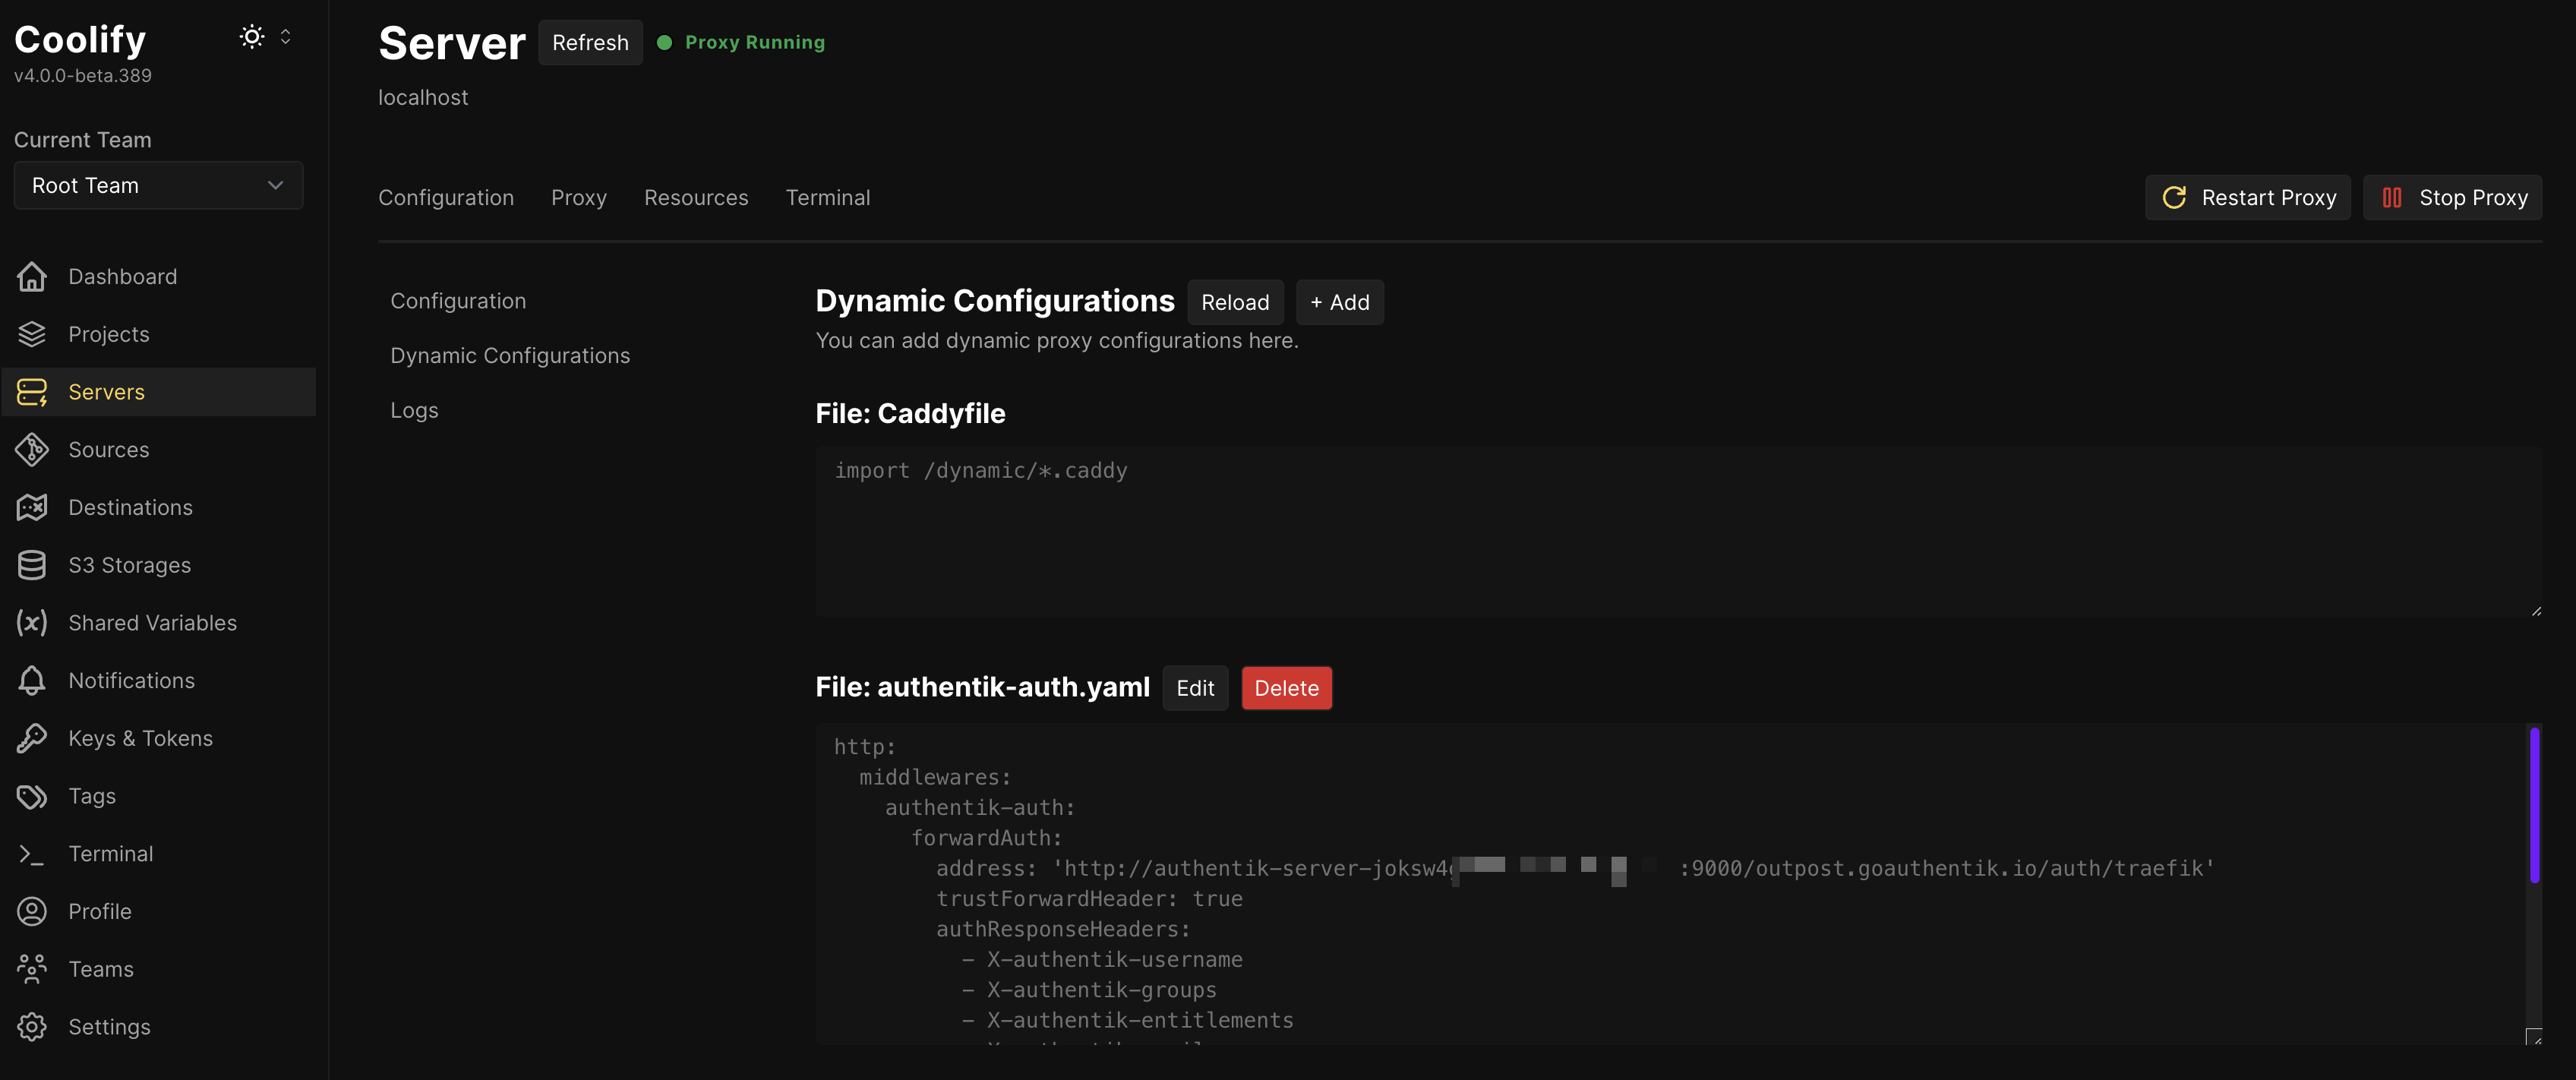
Creating the Dynamic Configuration File
Go to Servers (in the left panel) > localhost > Proxy tab > Dynamic Configurations. Add a new dynamic configuration. Set the filename to authentik-auth.yaml and paste the following content:
http:
  middlewares:
    authentik-auth:
      forwardAuth:
        address: 'http://AUTHENTIK_SERVER_HOST:9000/outpost.goauthentik.io/auth/traefik'
        trustForwardHeader: true
        authResponseHeaders:
          - X-authentik-username
          - X-authentik-groups
          - X-authentik-entitlements
          - X-authentik-email
          - X-authentik-name
          - X-authentik-uid
          - X-authentik-jwt
          - X-authentik-meta-jwks
          - X-authentik-meta-outpost
          - X-authentik-meta-provider
          - X-authentik-meta-app
          - X-authentik-meta-version
Replace AUTHENTIK_SERVER_HOST with the Authentik server host that you saved earlier. Then click Save.
Protecting Services
Finally, go to the services/apps you want to protect. In Configuration > General > Network, first uncheck Readonly labels and then under Container Labels find the label traefik.http.routers.https-0-XXXXXXX.middlewares (the XXXXXXX part is different for each service). Add authentik-auth@file to the value.
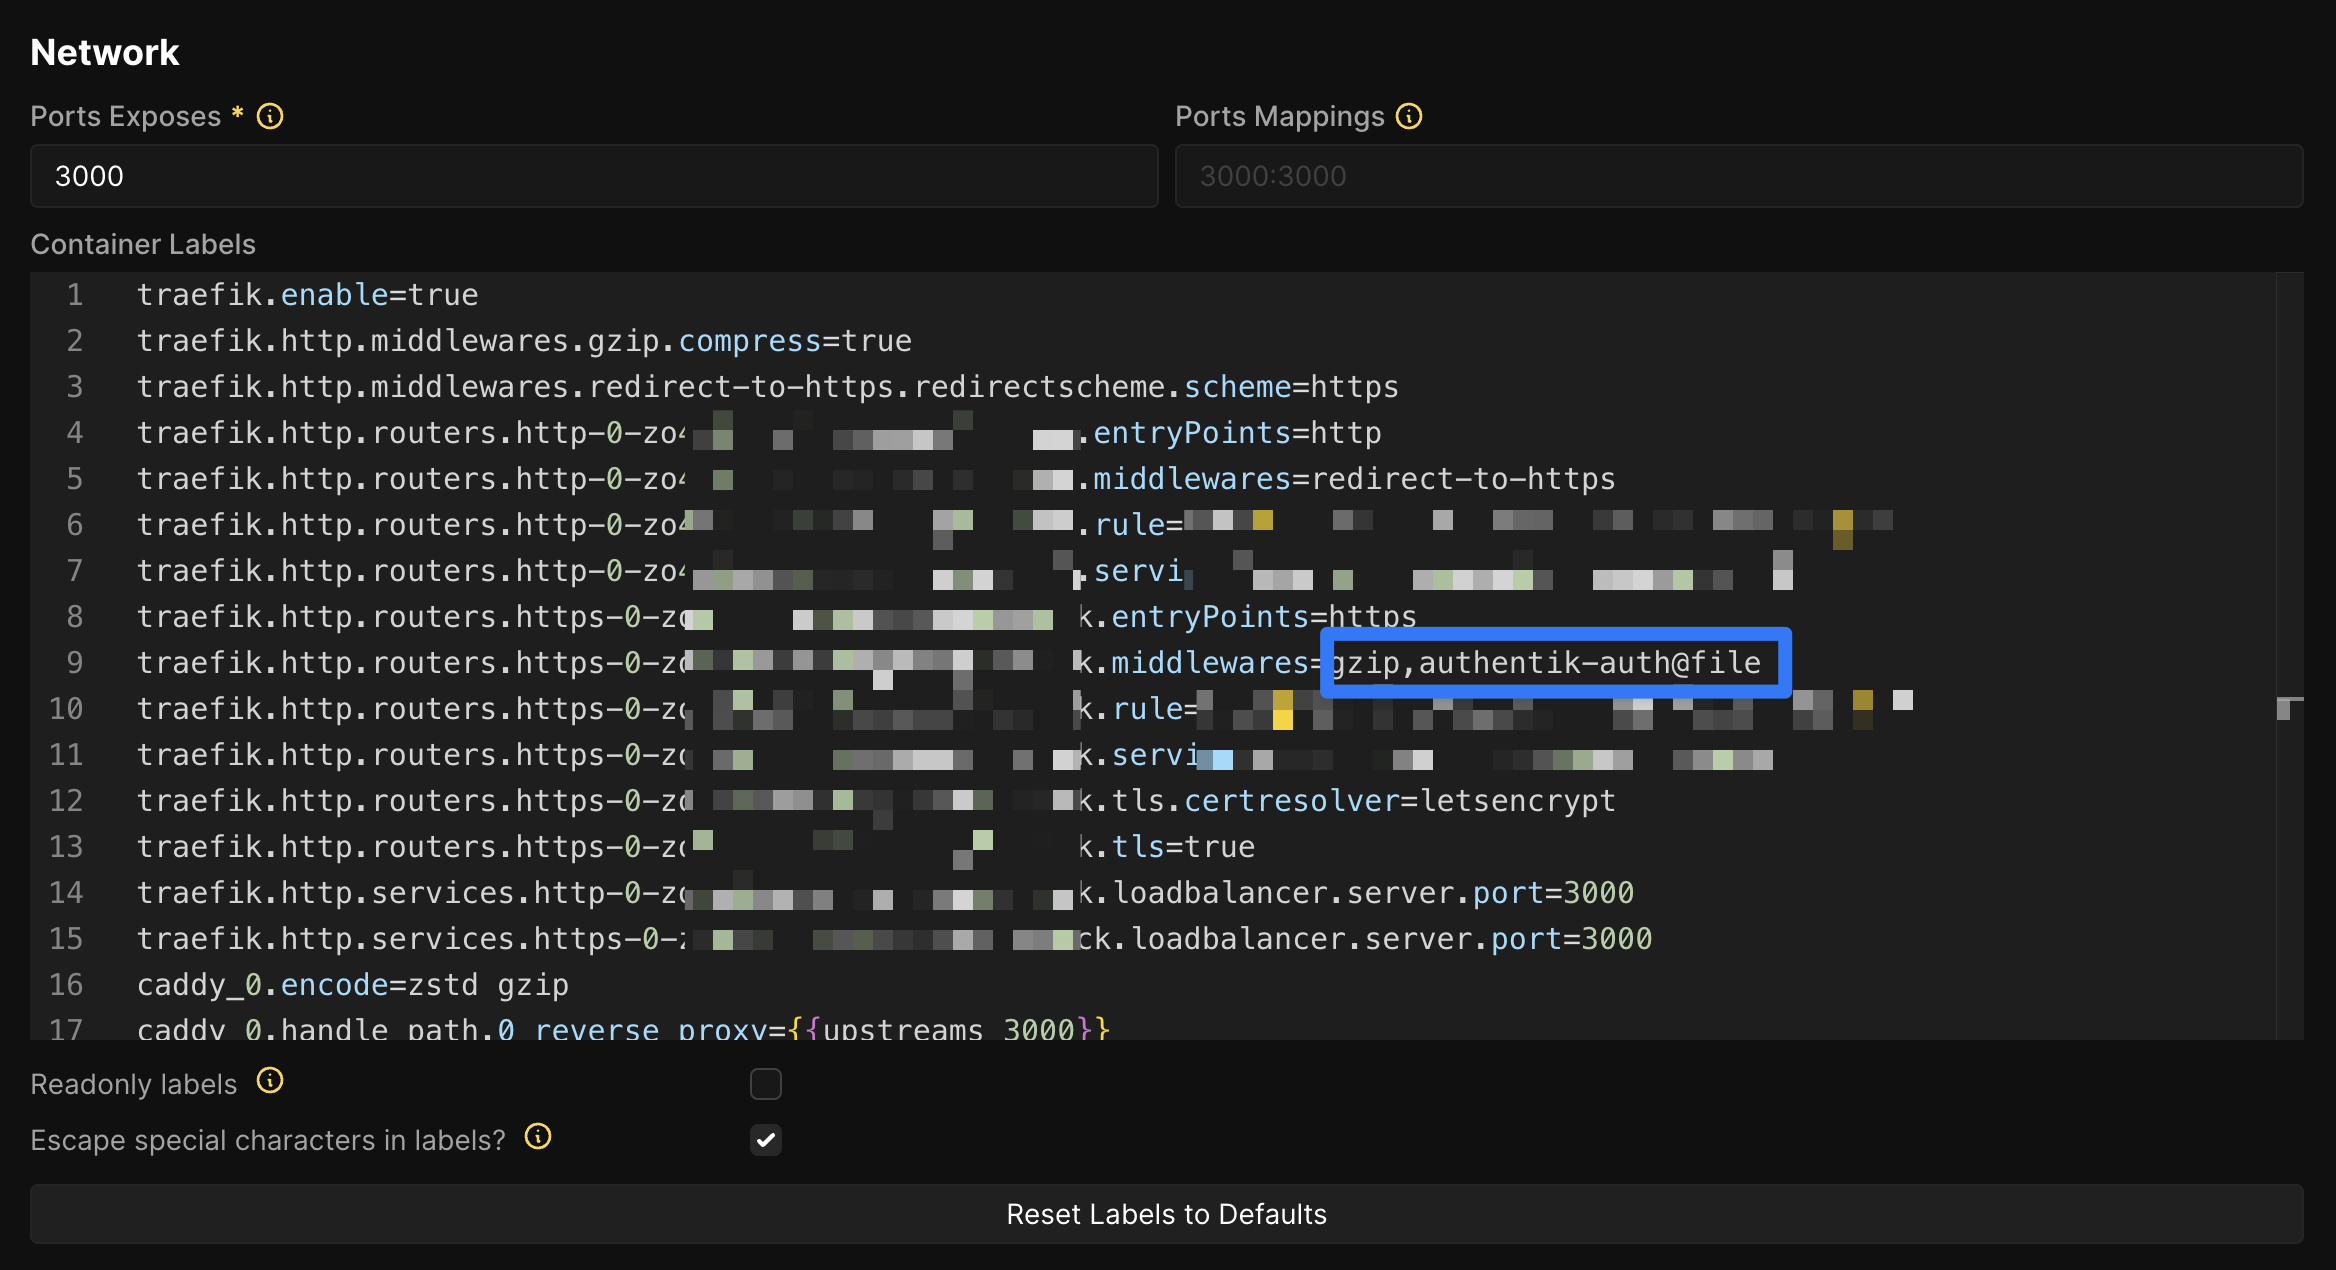
Save your changes, redeploy the service, and then visit it. You should be redirected to the Authentik login page. After logging in, you should be able to access the service.
By following these steps, you can integrate Authentik Forward Auth with Coolify, ensuring secure access to your services. If you have any issues or have suggestions, feel free to comment!